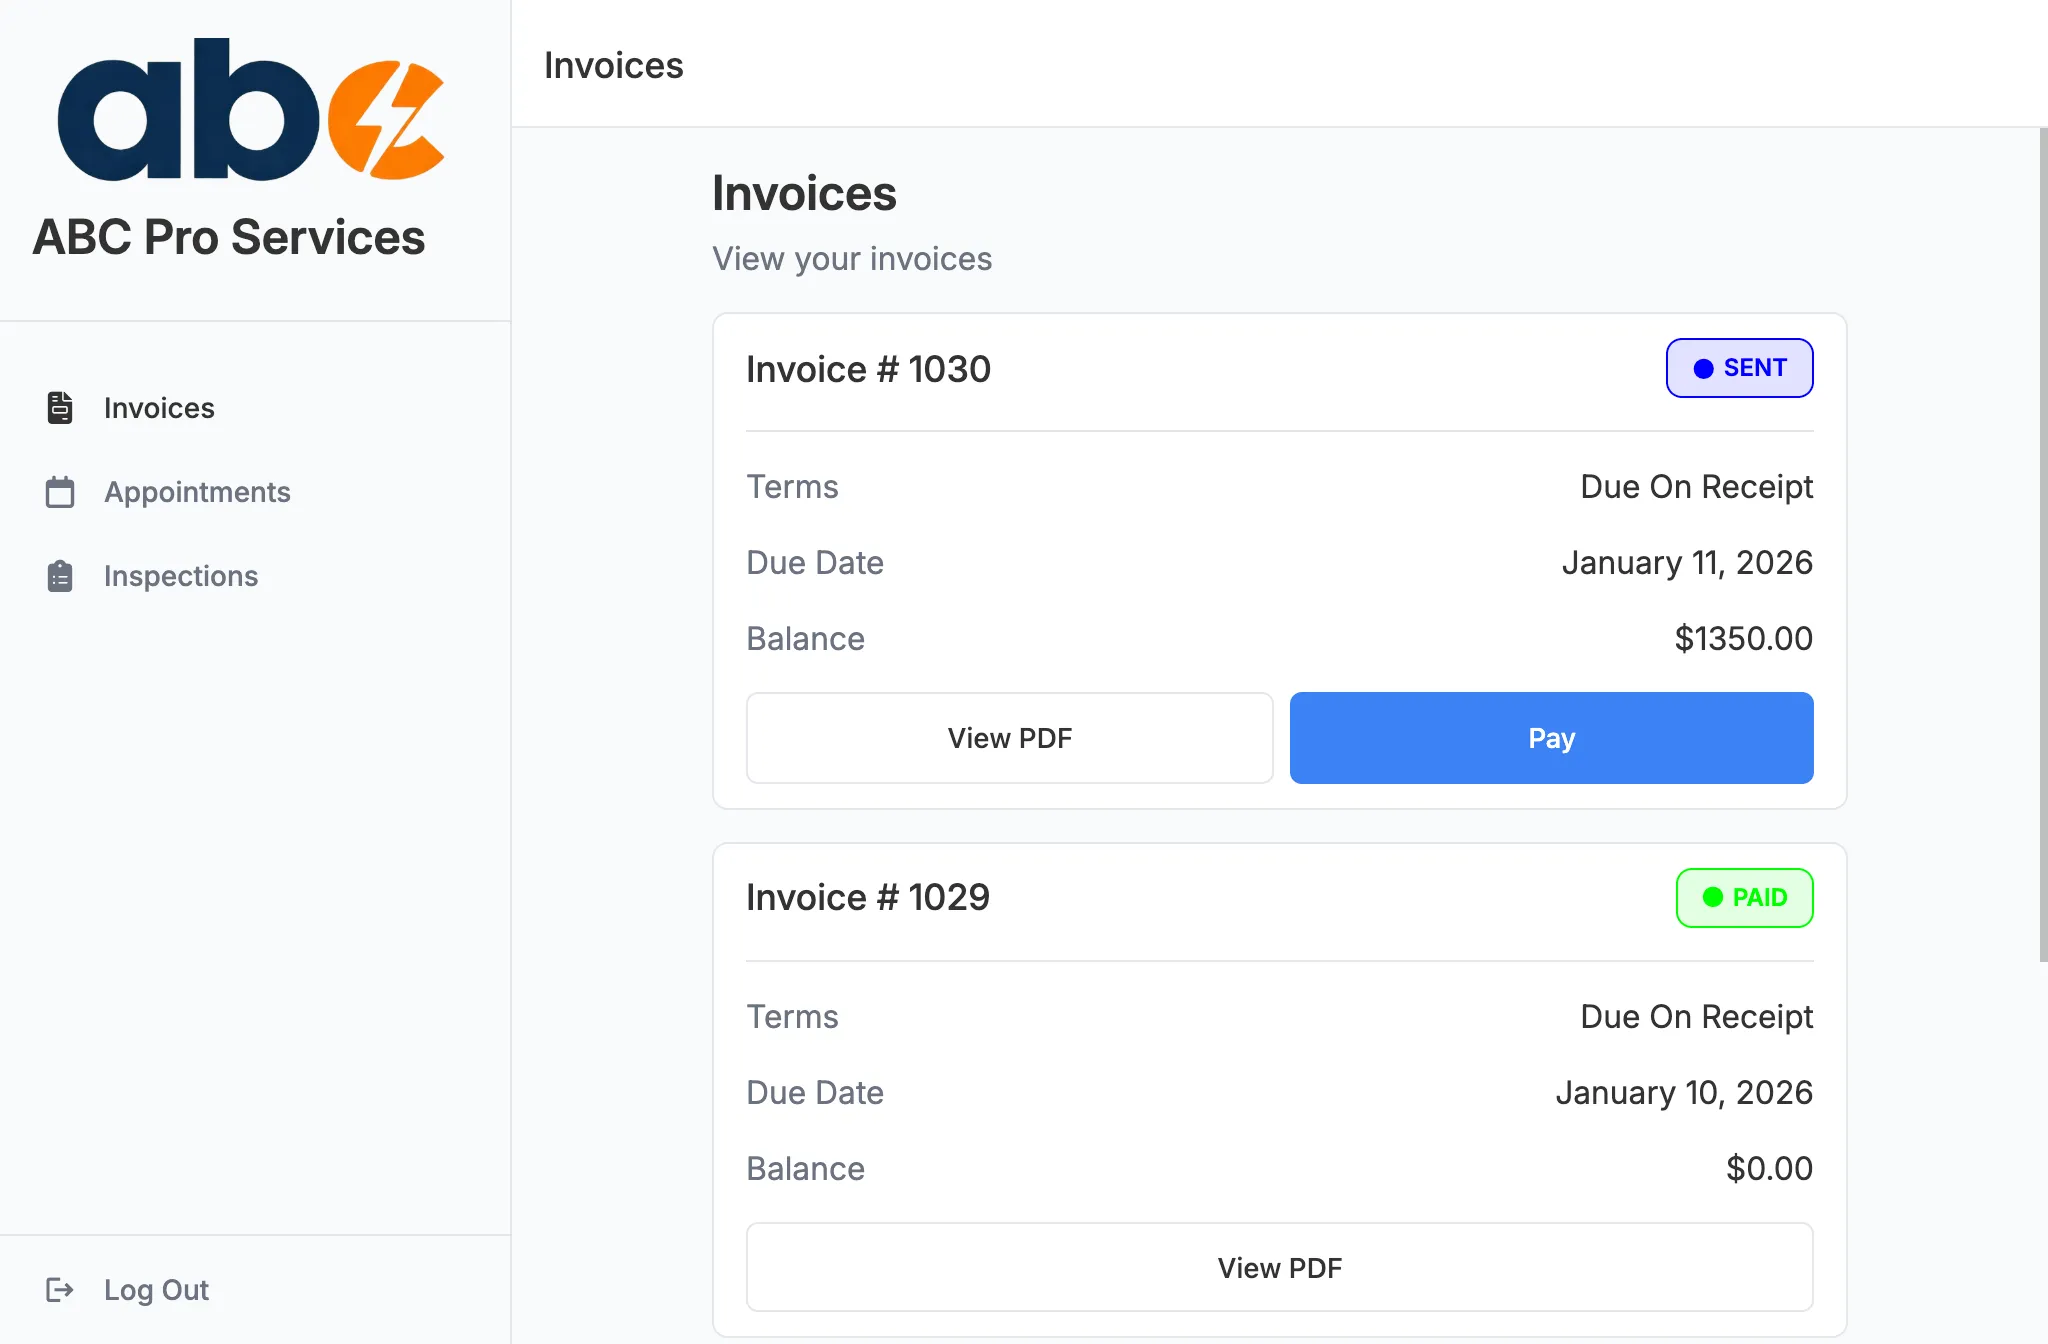
Accepting Zelle Payments
Learn how to set up Zelle as a payment option for your invoices and how clients will see it in emails and the client portal
Accepting Zelle Payments
Zelle is a fast, convenient payment method that allows your clients to send payments directly from their bank account. When you add Zelle as a payment option, it will automatically appear on your invoices alongside online payment options.
Setting Up Zelle Payments
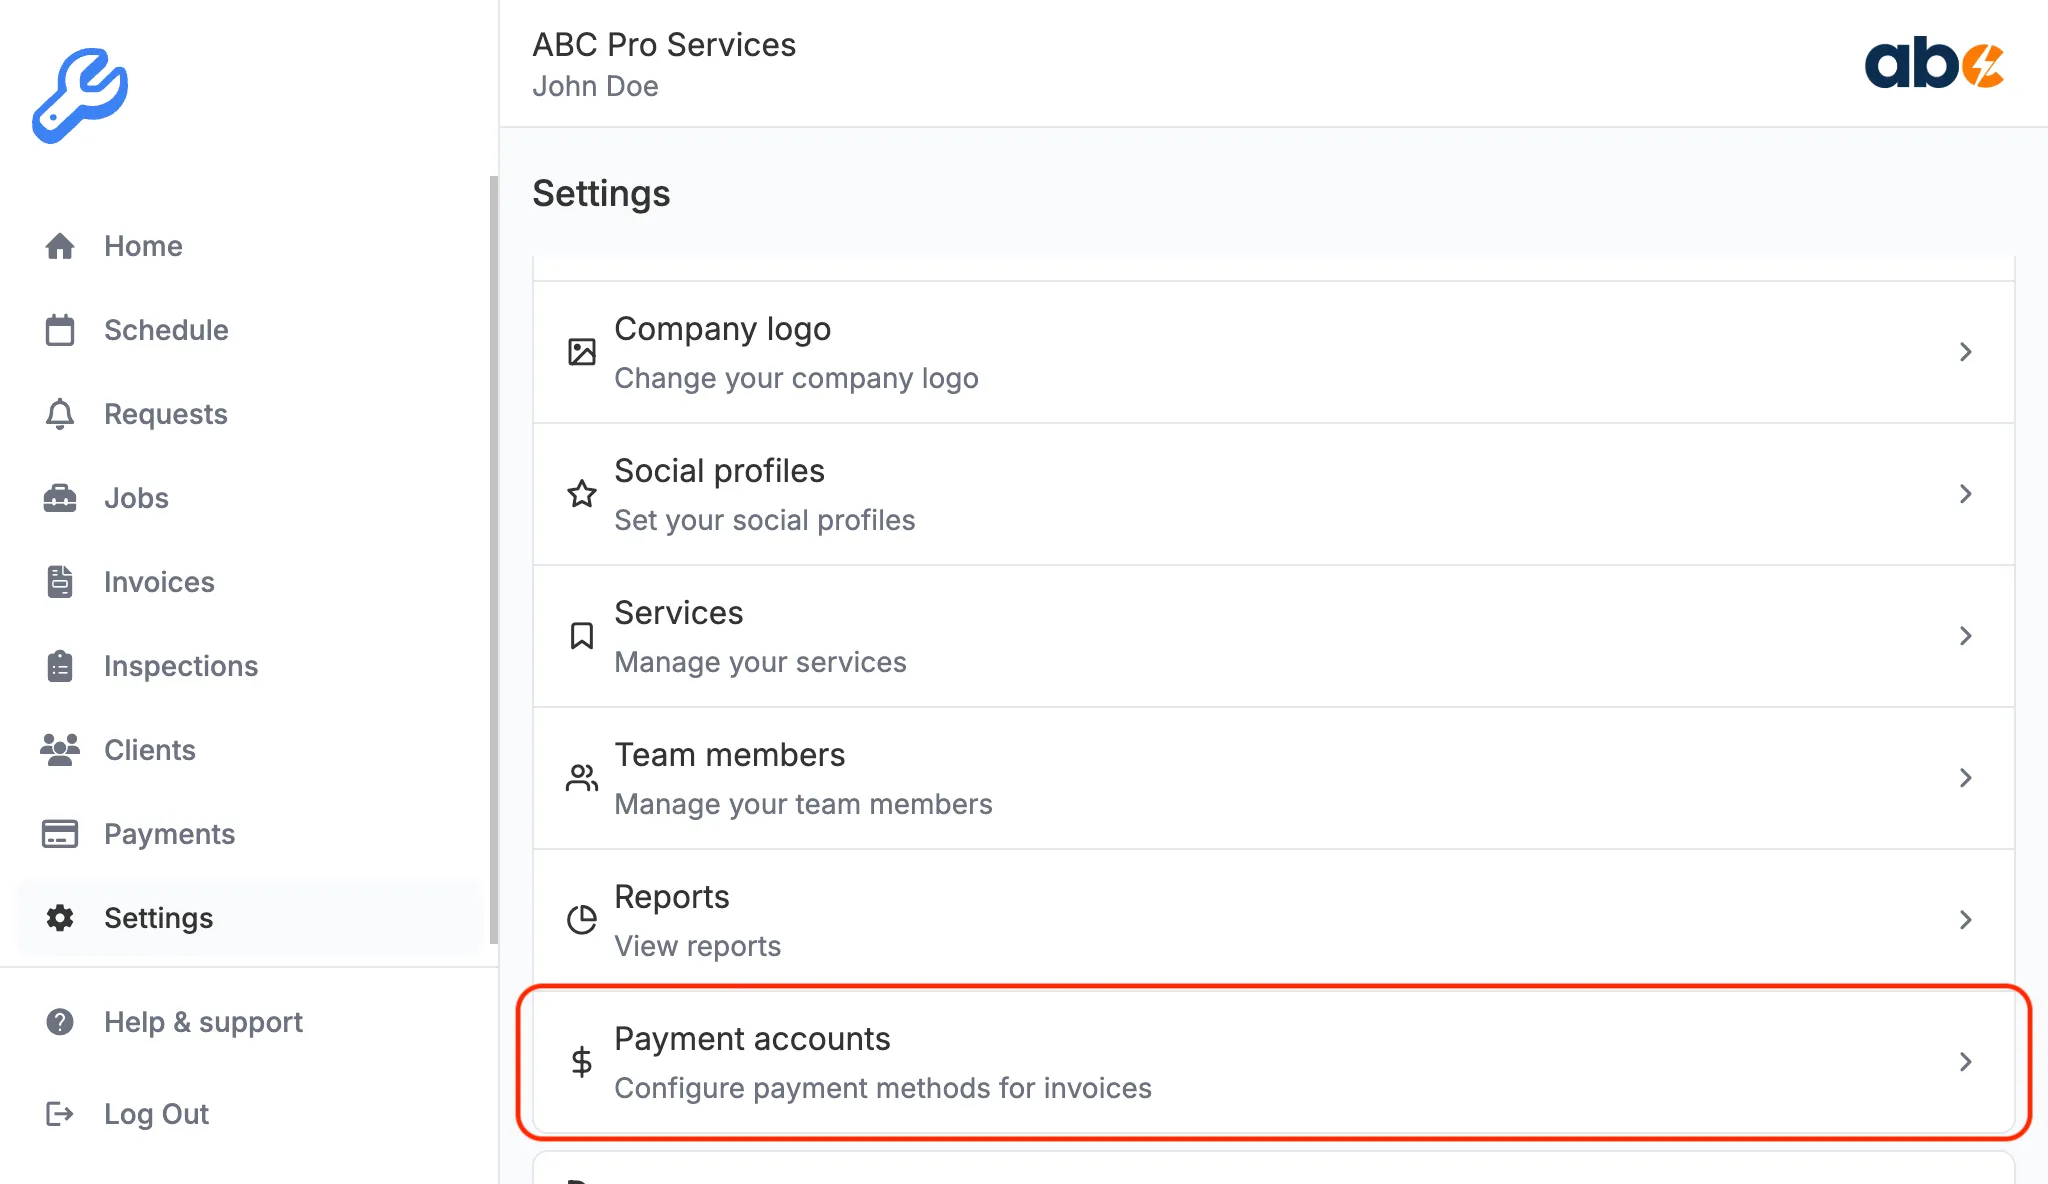
Step 1: Navigate to Payment Accounts
- Open the KorField Pro mobile app or web dashboard
- Go to Settings (tap the gear icon in the navigation)
- Select Payment Accounts
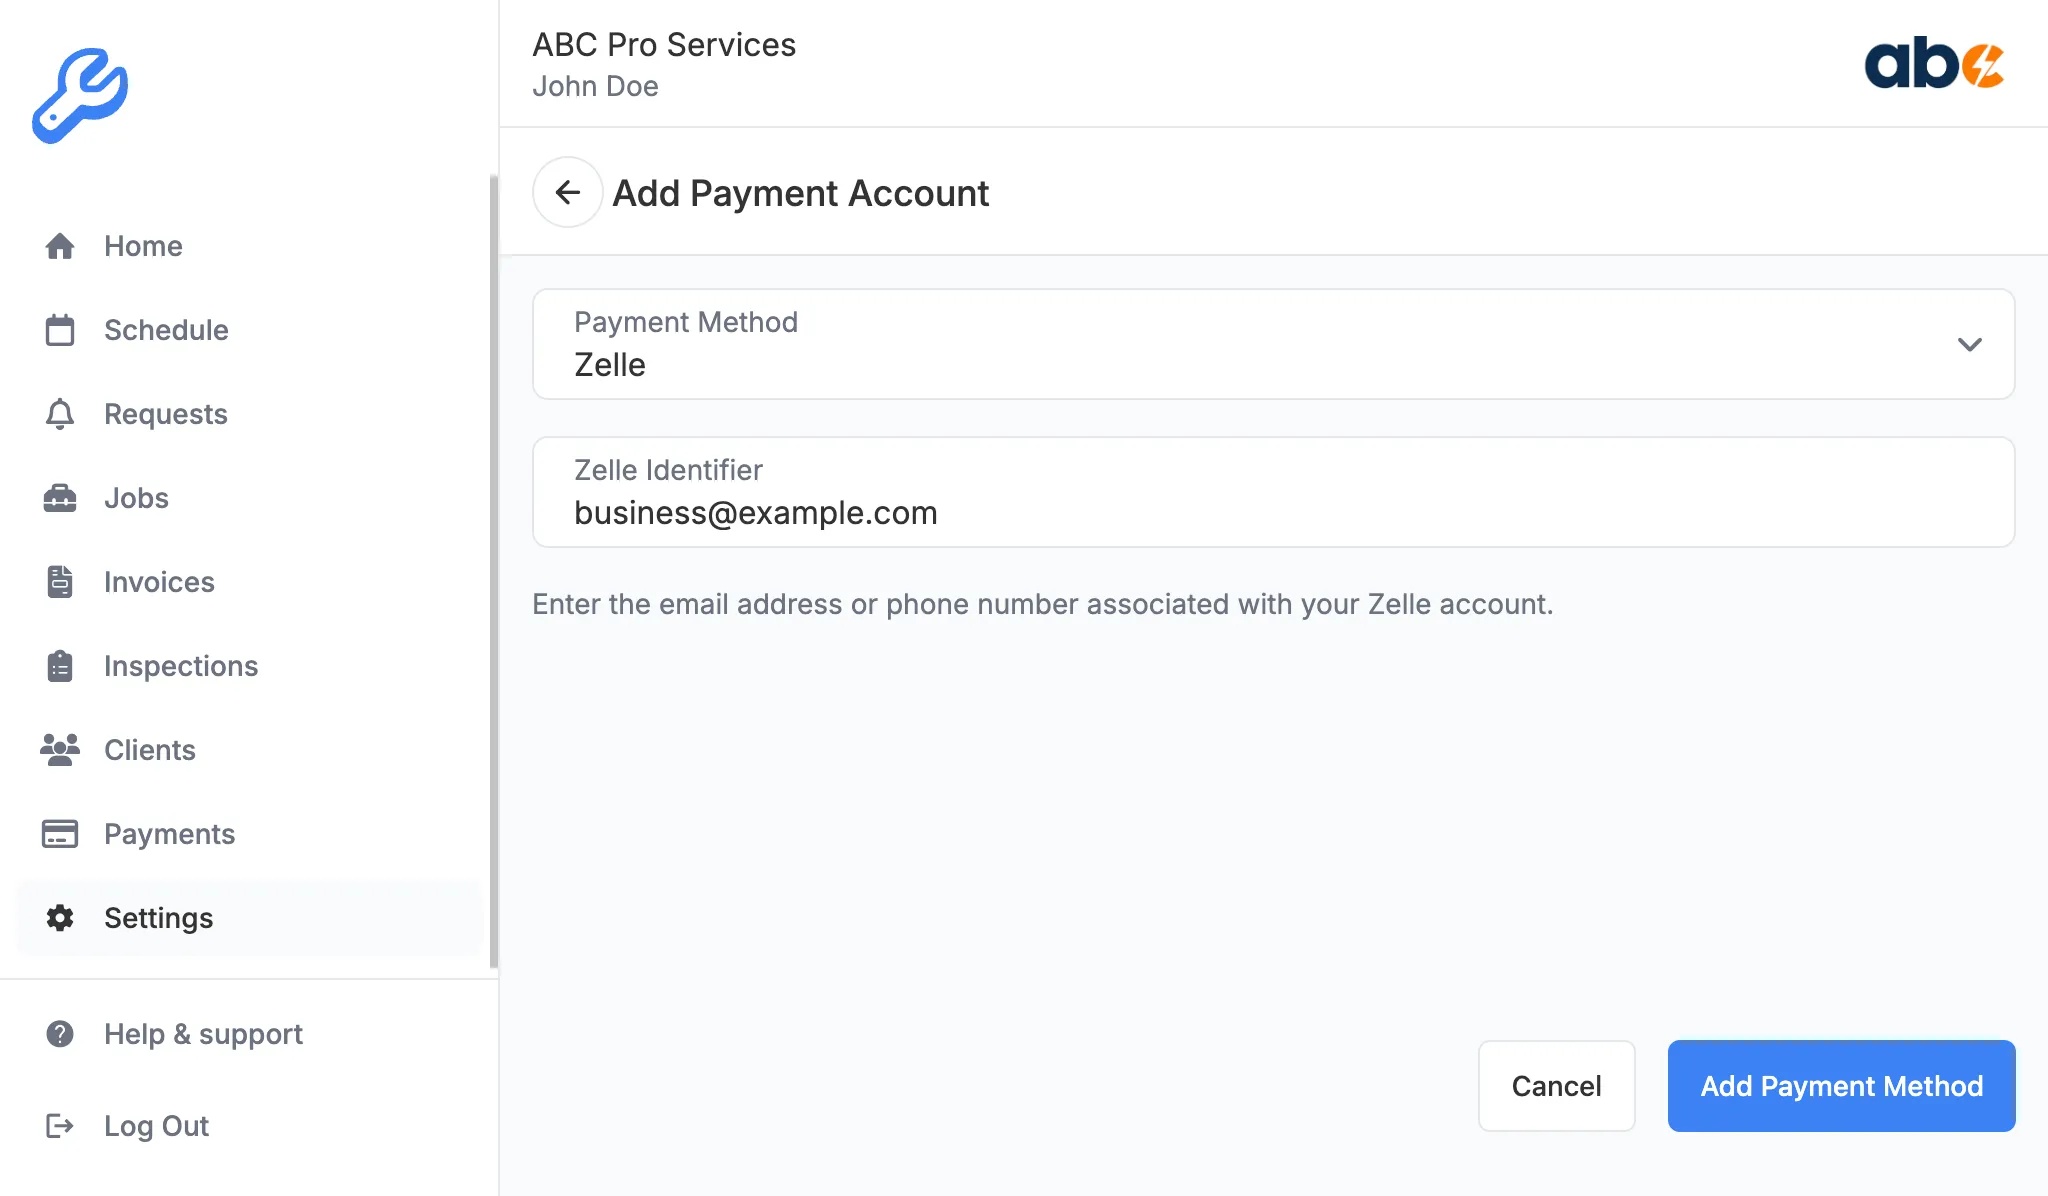
Step 2: Add Your Zelle Account
- Tap the Add Payment Account button
- From the dropdown menu, select Zelle
- Enter your Zelle identifier (this can be your email address or phone number registered with Zelle)
- Tap Add Payment Account
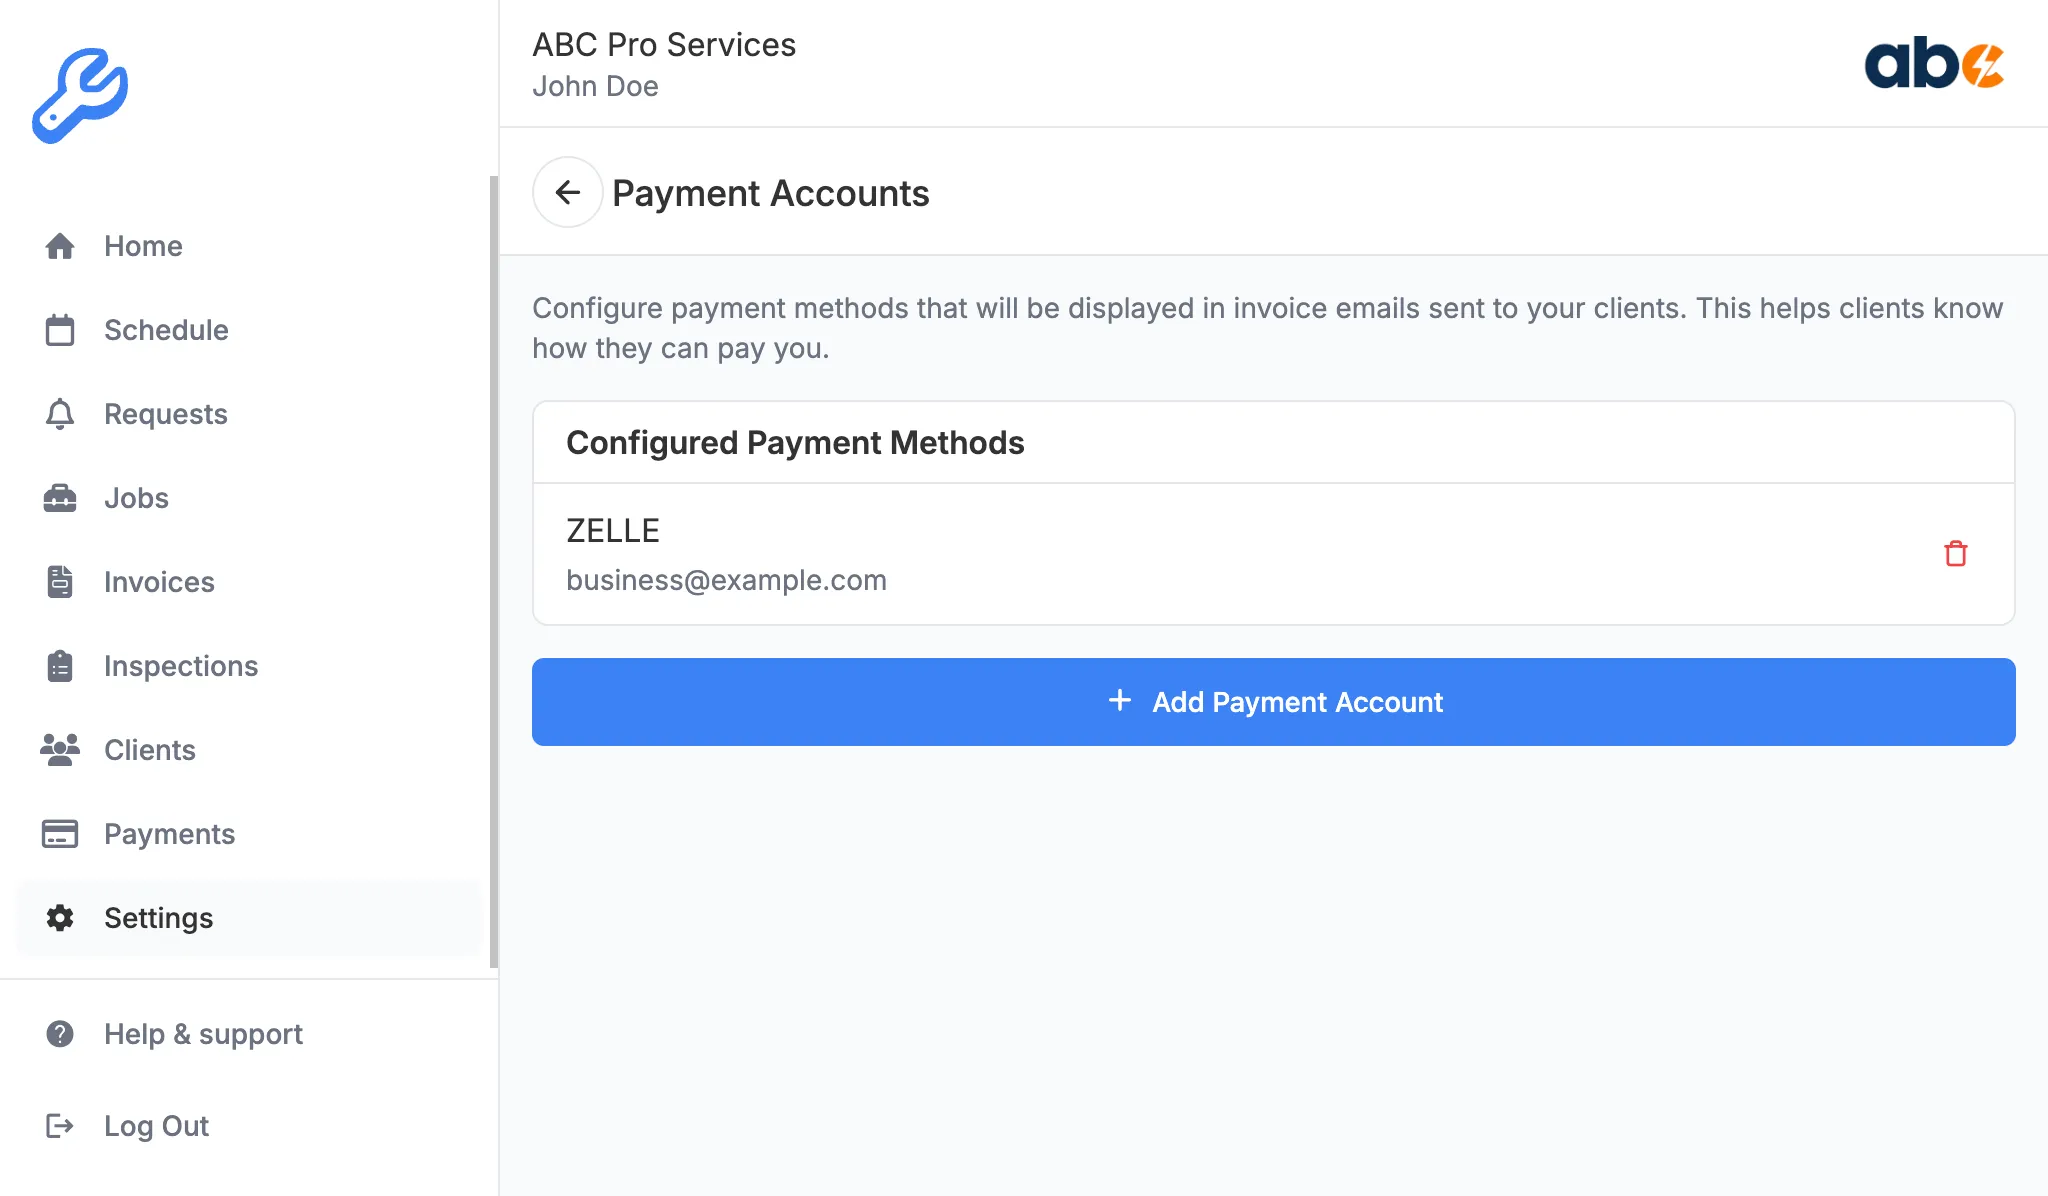
Step 3: Verify Your Payment Account
Once saved, your Zelle payment account will appear in the list of active payment accounts. You can add multiple payment methods (Zelle, Cash, etc.) and they will all be displayed on your invoices.
How Clients See Zelle in Invoice Emails
When you send an invoice to a client, they’ll receive an email with all available payment options presented in a clean, organized list.
Email Layout
The invoice email includes a Payment Options section that displays:
-
Online Payment (Credit/Debit Card) - If online payments are enabled
- Shows a “Pay Online” button that links to the secure payment page
- Includes description: “Pay securely through our client portal. Fast, secure, with instant confirmation.”
-
Zelle - If you’ve added a Zelle payment account
- Displays “Zelle” as the payment method name
- Shows your Zelle identifier (email or phone number)
- Formatted clearly so clients know exactly where to send payment
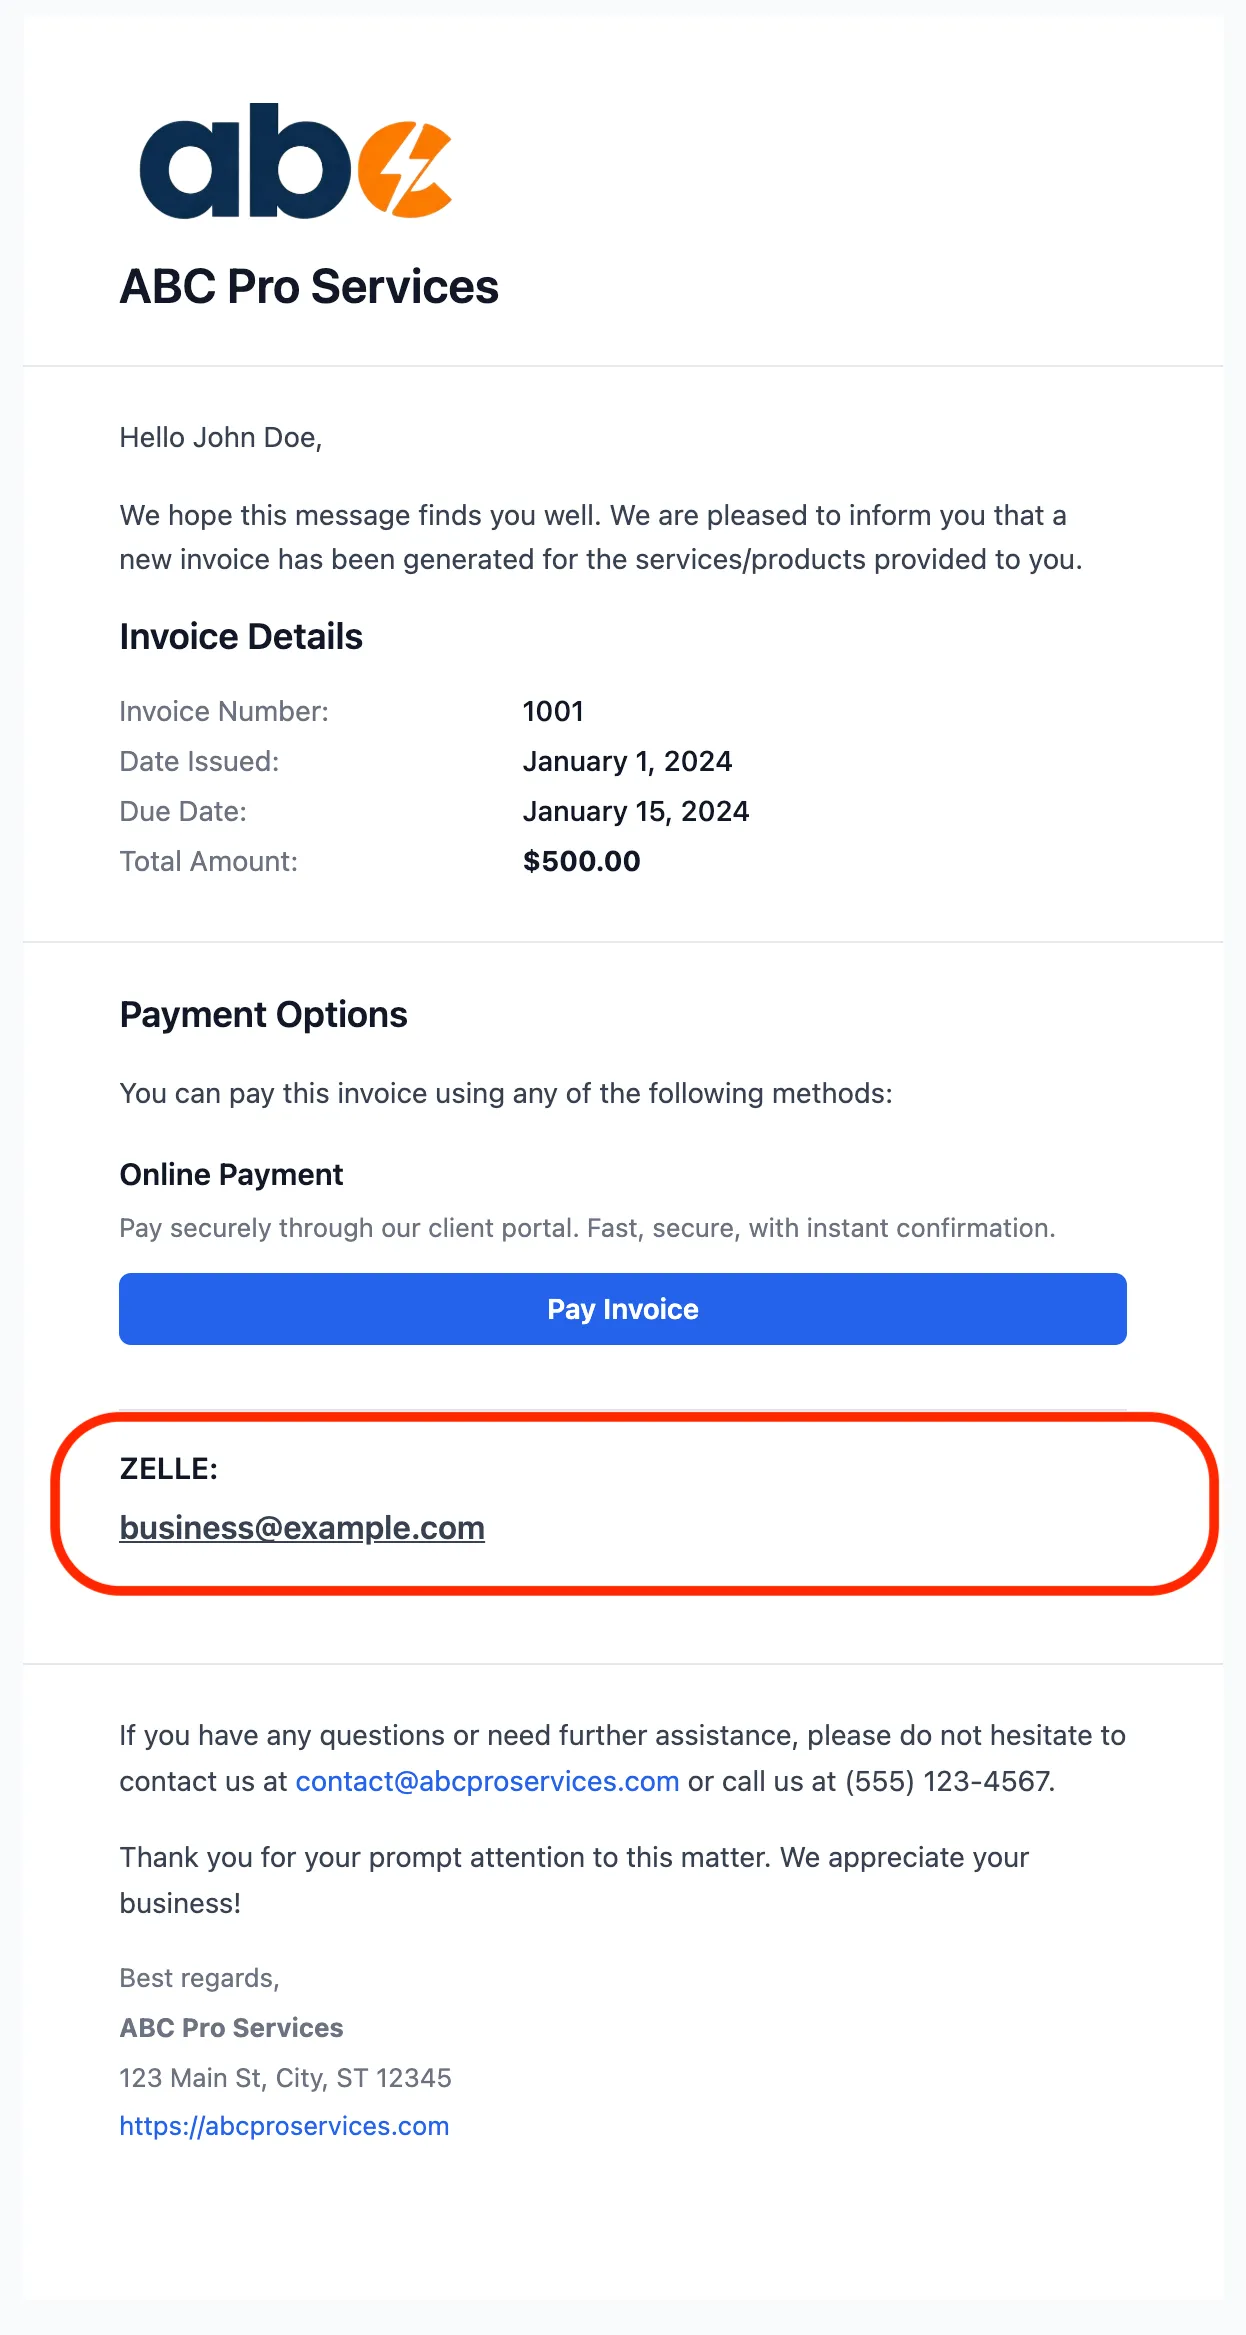
- First option shows “Online Payment (Credit/Debit Card)” with descriptive text and a blue “Pay Online” button
- Second option shows “Zelle” as a label with the Zelle identifier (like “business@example.com”) displayed below it in a slightly different style/color The design should be clean and minimalist with clear separation between the two options.*
How Clients See Zelle in the Client Portal
When clients access their invoice through the client portal, they have an even more detailed payment experience with tabs for different payment methods.
Accessing the Payment Page
- Client logs into the client portal
- Views their invoice
- Clicks the Pay button
- Opens the payment page with payment method tabs
Payment Method Tabs
The payment page displays tabs at the top. When the Zelle tab is selected, clients see the following information:

Best Practices
For Business Owners
- Use a dedicated business email or phone for your Zelle identifier to keep business and personal payments separate
- Verify your Zelle identifier is correctly entered to avoid payment issues
- Check your Zelle account regularly for incoming payments, as they require manual confirmation in KorField Pro
- Update invoice status manually after receiving Zelle payments (unlike online payments which are automatic)
For Your Clients
When a client pays via Zelle, remind them to:
- Include the invoice number in the payment memo/note
- Send the exact amount shown on the invoice
- Allow 1-2 business days for you to confirm and mark the invoice as paid
Troubleshooting
Zelle Not Showing in Email
If Zelle isn’t appearing in your invoice emails:
- Verify you’ve added a Zelle payment account in Settings → Payment Accounts
- Check that your Zelle identifier is filled in
- Send a new invoice (existing emails won’t update retroactively)
Zelle Tab Not Showing in Portal
If the Zelle tab doesn’t appear in the client portal:
- Confirm you have a Zelle payment account configured
- Ensure the payment account is active (not deleted)
- Ask the client to refresh the payment page
Client Sent Payment to Wrong Identifier
If a client accidentally sent payment to the wrong Zelle identifier:
- Contact the client immediately
- Ask them to request a refund through their bank (if possible)
- Provide the correct Zelle identifier
- Consider adding a note in your invoice emails with the correct identifier
Frequently Asked Questions
Can I have multiple Zelle accounts? Currently, you can have one Zelle payment account at a time. If you need to update your Zelle identifier, delete the old one and add a new payment account.
Do I need a business Zelle account? You can use either a personal or business Zelle account. However, a business account is recommended for better record-keeping and professionalism.
Are there fees for receiving Zelle payments? Zelle itself doesn’t charge fees, but check with your bank as some banks may have policies around business accounts and payment volumes.
How do I mark an invoice as paid after receiving Zelle payment? Navigate to the invoice in your dashboard, then manually update the payment status. We’re working on making this process even easier in future updates.
Can clients pay partial amounts via Zelle? Yes, but you’ll need to track partial payments manually and update the invoice balance accordingly.
Need More Help?
If you have questions about setting up Zelle payments or need assistance with payment tracking, contact our support team at support@korfieldpro.com.